Skull Lamp Tutorial
Greetings fellow Monsters,
I was in desperate need of a new desk / work lamp for our workshop for all those late nights working. I searched around on the inter-web to trying and find one I liked, but they were either not in an style that was appropriate, or too damn expensive, so I decided to build one on my own in 1-1/2 days with basically stuff we had around the shop.
I only needed to actually purchase a few specific things to make it all come together, so I don't know the EXACT cost it took to make this, but I know I spent less than $20 bucks on the specific items I didn't have.
I documented everything as I went along and decided to write my first tutorial that I could share here on the Monster Guts Forum.
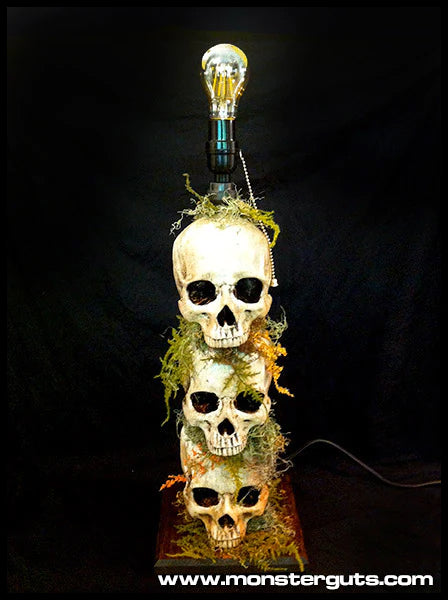
This is the end result:

IMPORTANT: This project requires working with ELECTRICITY and WIRING. Please read and follow the steps / instructions that come with the lighting fixtures materials to ensure you are connecting them properly. I, nor Monster Guts / Monster Guts Forum take any responsibility if you electrocute yourself. BE SAFE!
I suggest you read this whole tutorial so you know what parts you will need and the steps to take in advance.
STEP 1: SKULLS AND LAMP POST:
You sort of need to do 2 steps at the same time to get things started. You need to find the skulls you want to use for this project, and get the materials to make the lamp post that goes up inside with a base.
We got these skulls of Ebay last year sometime and they were about $12-$15 each from China. They have good detail and have very thin internal walls inside them and are made with a plastic resin sort of material. We got the "unpainted" versions that came with a jaw that we ended up not using for this project.
Because the walls are very thin, you have to be very careful in drilling these because you could shatter the skulls easily. You don't HAVE to use these exact skulls. You can use whatever skulls you have available, Buckys, Barneys, etc.
If you DO use these type of skulls, drill a small hole underneath and then use a Dremel to widen the hole. Because the Dremel is grinding outwards and not down against the skull itself, you can move the Dremel around and around to make the hole big enough for the lamp post shaft to push though.
I used an 18" long - 1/2" sized piece of the dark grey PVC pipe for my lamp shaft. I went with PVC so I could cut it easily and it is lightweight. I also got the type of PVC pipe that is threaded on both ends. I will explain why later.
Push the PVC pipe into the hole under the skull, then mark the top of the skull where you want to have the pipe come through. Take the pipe out and drlll small hole in the top and then Dremel the hole bigger so the pipe goes through. Do this with all the skulls you are putting on this lamp and test fit each one on top of each other so they light up straight.
When you are done, your skulls should look like this:

STEP 2: BASE-COAT PAINTING SKULLS:
There are a thousand tutorials about how to paint and age skulls online. This is how I do it.
First of all, for the "aging" I use Minwax Gel Stain: Aged Oak Color. The reason I use Minwax Gel Stain is because it is a thick "pudding-like" mixture and doesn't run all over the place when applying it. Aged Oak is a decent color but you can pick your own color. Never use any "red" colored stain because it looks awful. Minwax Gel Stain is also fairly weather / water proof and doesn't wash off like acrylic paints, but you can use acrylic paints to age your skulls if you intend to NEVER get it wet or use outdoors.
You need to Base-coat the skulls because the stain won't stick well if directly applied to the skulls. You MUST use a SATIN, SEMI-GLOSS, or GLOSS paint because FLAT colored paint absorbs to much of the stain and makes it look way to dark.
The satin, semi-gloss, and / or gloss finish doesn't absorb the stain, so you can wipe it down and only leave the stain in the cracks and crevices.

When applying the white base-cost I start from the underneath of the skulls so when that is dry I can concentrate on the main top and front which is the part you will see the most off when it is all done. Don't want any drips or blotched paint marks.


When you are done with the underside and they are dry, flip 'em over and do the remaining top and front areas.
STEP 3: LAMP BASE:
So while your skulls are drying, you can get to work on your base.
The base size really is based on the size of the skulls you are using. I cut my bases to about 8" squared. Use pine wood or something similar if you are cutting your own. DO NOT use plywood because the edges will look bad and you will see all the layers that make up the plywood itself.
You can also BUY a base wood form at places like Home Depot, Lowes, or Michael's. They have some good choices that are already beveled and fancy, usually in the plaque or wall decorative wood section.
I made my own with some scrap wood we have around the shop and then routered the edges for a nice 45 degree bevel ... and it was FREE!


Take your threaded PVC pipe and screw it a galvanized 1/2" metal flange (available in just about every plumbing department for about $5-$6). This is how you will / can attach your post to your base.
If you notice in the photo below, I didn't put the post dead CENTER onto the base because where the skulls sit on the post, the post is slightly back a little bit to the skull itself will be centered when its all attached. Put a skull (if its dry from painting) and put it onto the base to line everything up.
Use a pencil and gently circle the metal flange base. I say gentle because you don't want to mark up the base if you intend on staining it. You can sand the pencil marks off after you drill all the holes you need.


STEP 4: LAMP BASE DRILLING:
Now that you have your base all pencil marked, you need to drill a hole through it for the wire that powered the lamp to pass through.
Drill a hole (I did about a 1/2" hole) big enough for the wire to pass through from underneath.

When you've drilled the hole, if you can, use a router or similar tool to cut a "trench" on the underside of the base so the wire has somewhere to travel underneath to get to the back edge and still allow the base to sit flat when it is on a table top or wherever.


STEP 5: LAMP BASE STAINING:
I chose to stain my base for the lamp, but you can just as easily paint it. I went with a darker "espresso" color to counter the lighter color of the skulls. Once I stained the base, I used a semi-gloss polyurethane coating to give it a nice finish.

STEP 6: PAINTING LAMP POST:
Here is my lamp post before painting.

I had 2 choices of top end caps to use and couldn't decide which so I painted both to see which one I would like better to make the final decision later.
I drilled 1 3/8" hole at the top of each end cap, dead center. This is what the threaded "nipple" used for attaching most lamp fixtures uses.


One top end cap had a slight "curve" at the top that I was able to sand down flat so the lamp fixture that goes all the way at the top would sit flush and flat (see last photo above).
I used a black PRIMER paint to base coat everything. The primer I used supposedly (what the label says) will work on wood, metal, and plastic.
When that was dry, I used a HAMMERED-TEXTURE bronze color paint to make the whole post look like metal and not a mixture of metal and plastic.


When that was dry, I painted the 4 screws that would attach the post flange bottom to the stained wood base. For this I just used the black primer I used originally on the lamp post.


STEP 7: STAINING SKULLS:
As I mentioned before, there are thousands of tutorials about painting / staining skulls.
I start with the underside because you can do this quick and most of it is never seen so when you get it done, you can put you fingers in the bottom hole so you have a firm grip on it and then do the rest of the skull all at once.
Slop the stain into the nose and eye holes (you aren't going to wipe those ever) so that no white or bare area is showing. Then applied a good amount around the rest of the skull. You have to work fast because the stain starts to dry quickly. If it DOES dry that you can't wipe it, put more stain on it and the chemical in the stain will "re-activate" the stain and you will be able to wipe it away.
Wipe away all the stain. DO NOT put too hard because you will accidentally take the white PAINT off if you rub too hard.
Go around and wipe all the exposed areas and the stain will remain in the cracks an crevices, giving a nice "aged" look.


It was hard to take photos of this step because my hands were COVERED in stain!
STEP 8: WIRING:
Below are pretty much the only "parts" I needed to buy because I already had all the other stuff from past projects.
You will need the lamp socket, hex nuts and nipples for lamp fixtures. Check that your lamp fixture does in fact use 3/8" threaded nipples to attach.


I chose to go with a dark brown pull chain light fixture socket.
For the lamp cord, I used a $1 extension cord for the .99 cent store. I simply cut the end put receptacle off and *balmmo* - instant lamp cord with a plug on it.


Take the top end cap off the lamp post and run the wire up inside the post. Give yourself plenty of slack to work with at the top.
BEFORE you attach the light socket fixture and the like, test fit all your skulls to make sure the lamp post is the right length for where you want the lamp to finally seat. I ended up taking 1" off the top of the post because I wanted the fixture to sit just above the top skull. It is a pain in the butt to cut the PVC pipe when the wire and everything is attached, so check it first.
Run the wire through the nipple piece and put a hex nut on it. This nut will sit UNDER the top cap and your light socket fixture will sit ABOVE the cap and clamp down on the cap when it is screwed together.
Do not have the cord plugged in when doing all this!


Attach the top light socket fixture per the directions that came with it. Thread the socket onto the nipple in the top cap and make sure it is snug and fits solid. Pull the wiring from underneath the base to take up the slack and attach the top end cap to the top of your lamp post.
STEP 9: LET THERE BE LIGHT:
I decided to add some Spanish moss and and fake vegetation (both from Michael's craft store) in between the skulls. Originally I was going to glue / epoxy the skulls together on the lamp post, but when I started to add the "greenery" it made it a lot easier to adjust the skulls around to make everything fit WITHOUT them being glued together.
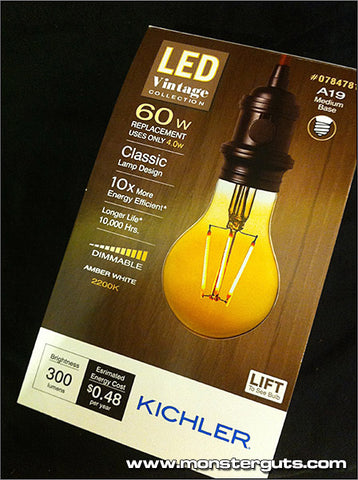
Because I am using an LED vintage style light bulb for it (which was the very last purchase for this project), the bulb doesn't heat up at all, so there is no worry about heat and anything dry catching fire. I strongly suggest using an LED style bulb for this reason.
An extra added bonus is this LED light is DIMMABLE ... for sexy mood lighting, too.
I stuck the Spanish moss in the gaps between the skulls first and this gave a good "footing" to attach the other leaves and stems from the other fake vegetation. With the skull not being glued, the Spanish moss keeps everything in place and I could make any adjustments easily.
So here it is again ... in all it's glory.
Not bad for a 1-1/2 day project and most of that was waiting for paint, stain, and polyurethane to dry.


Previous article
Next article